
We teamed up with Rachel Smith from The Crafted Life to share this bright DIY that will help you add a little colour to your walls this summer! With a little bit of paint, a few wood blocks, and your stunning photos, you’ll have colourful Instagram wall art in no time.
DIY excerpt from The Crafted Life:
- Time: 30 minute
- Materials: 4×4″ photo prints, wood blocks, paint, decoupage, brushes
1. Paint!
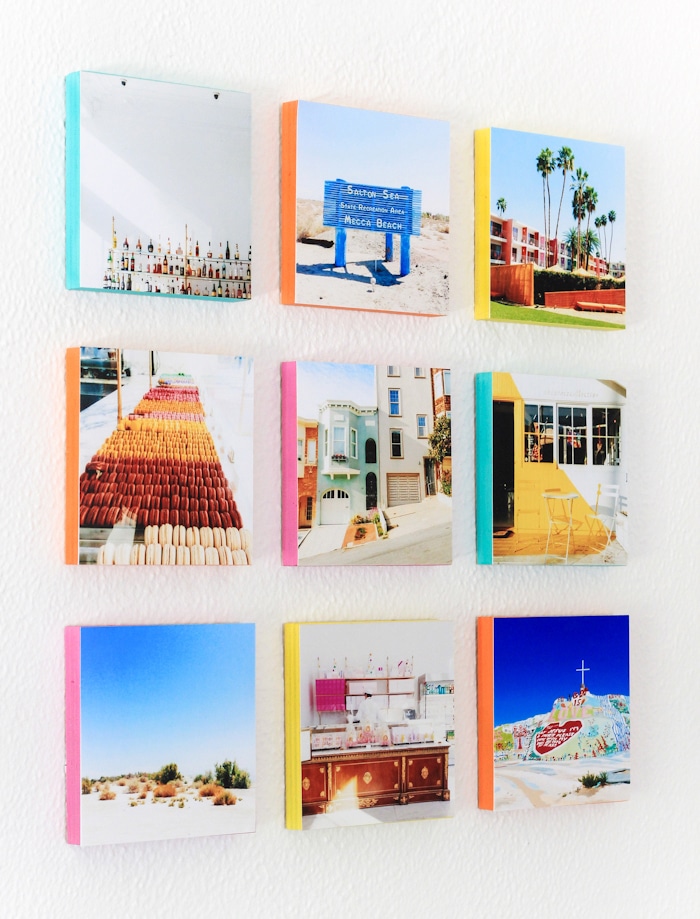
Paint the edges of your wooden blocks. Don’t worry if you get paint on the flat sides since one side will face the wall and the photo will cover up the other.
2. Add your photos!
Once the paint is dry, apply a thin layer of decoupage to the block and then place your photo. When your photo is in the desired position, let it dry flat.
3. Ready, steady, hang your Instagram Wall Art!
Hang on your wall in a grid, shape, or any way you like! I recommend that you use removable velcro hangers, they won’t hurt your walls and your art will hang flat. Easy peasy, don’t you think?

Thanks for sharing, Rachel! Check out the rest of her awesome DIY Instagram Wall Art and get craftin’!
Photos courtesy of The Crafted Life.
What did you create on Snapfish? Share it with us on social media! You can tag us with @snapfishuk in your photos on Instagram or Facebook or use the hashtag #snapfishuk. Don’t forget to follow us on YouTube , Twitter and Pinterest, too. We love seeing what you create.